That refreshing glass of cold water from your refrigerator dispenser can quickly turn into a source of frustration when calcium deposits start to clog the system. These pesky mineral build-ups not only reduce water flow but can also affect the taste and overall hygiene of your drinking water. Ignoring these deposits can lead to further complications, potentially damaging the dispenser mechanism. Fortunately, removing calcium deposits from your refrigerator water dispenser is a straightforward process that can be accomplished with simple household items and a bit of patience. Keep reading to learn how to tackle this common problem.
Understanding Calcium Deposits in Your Water Dispenser
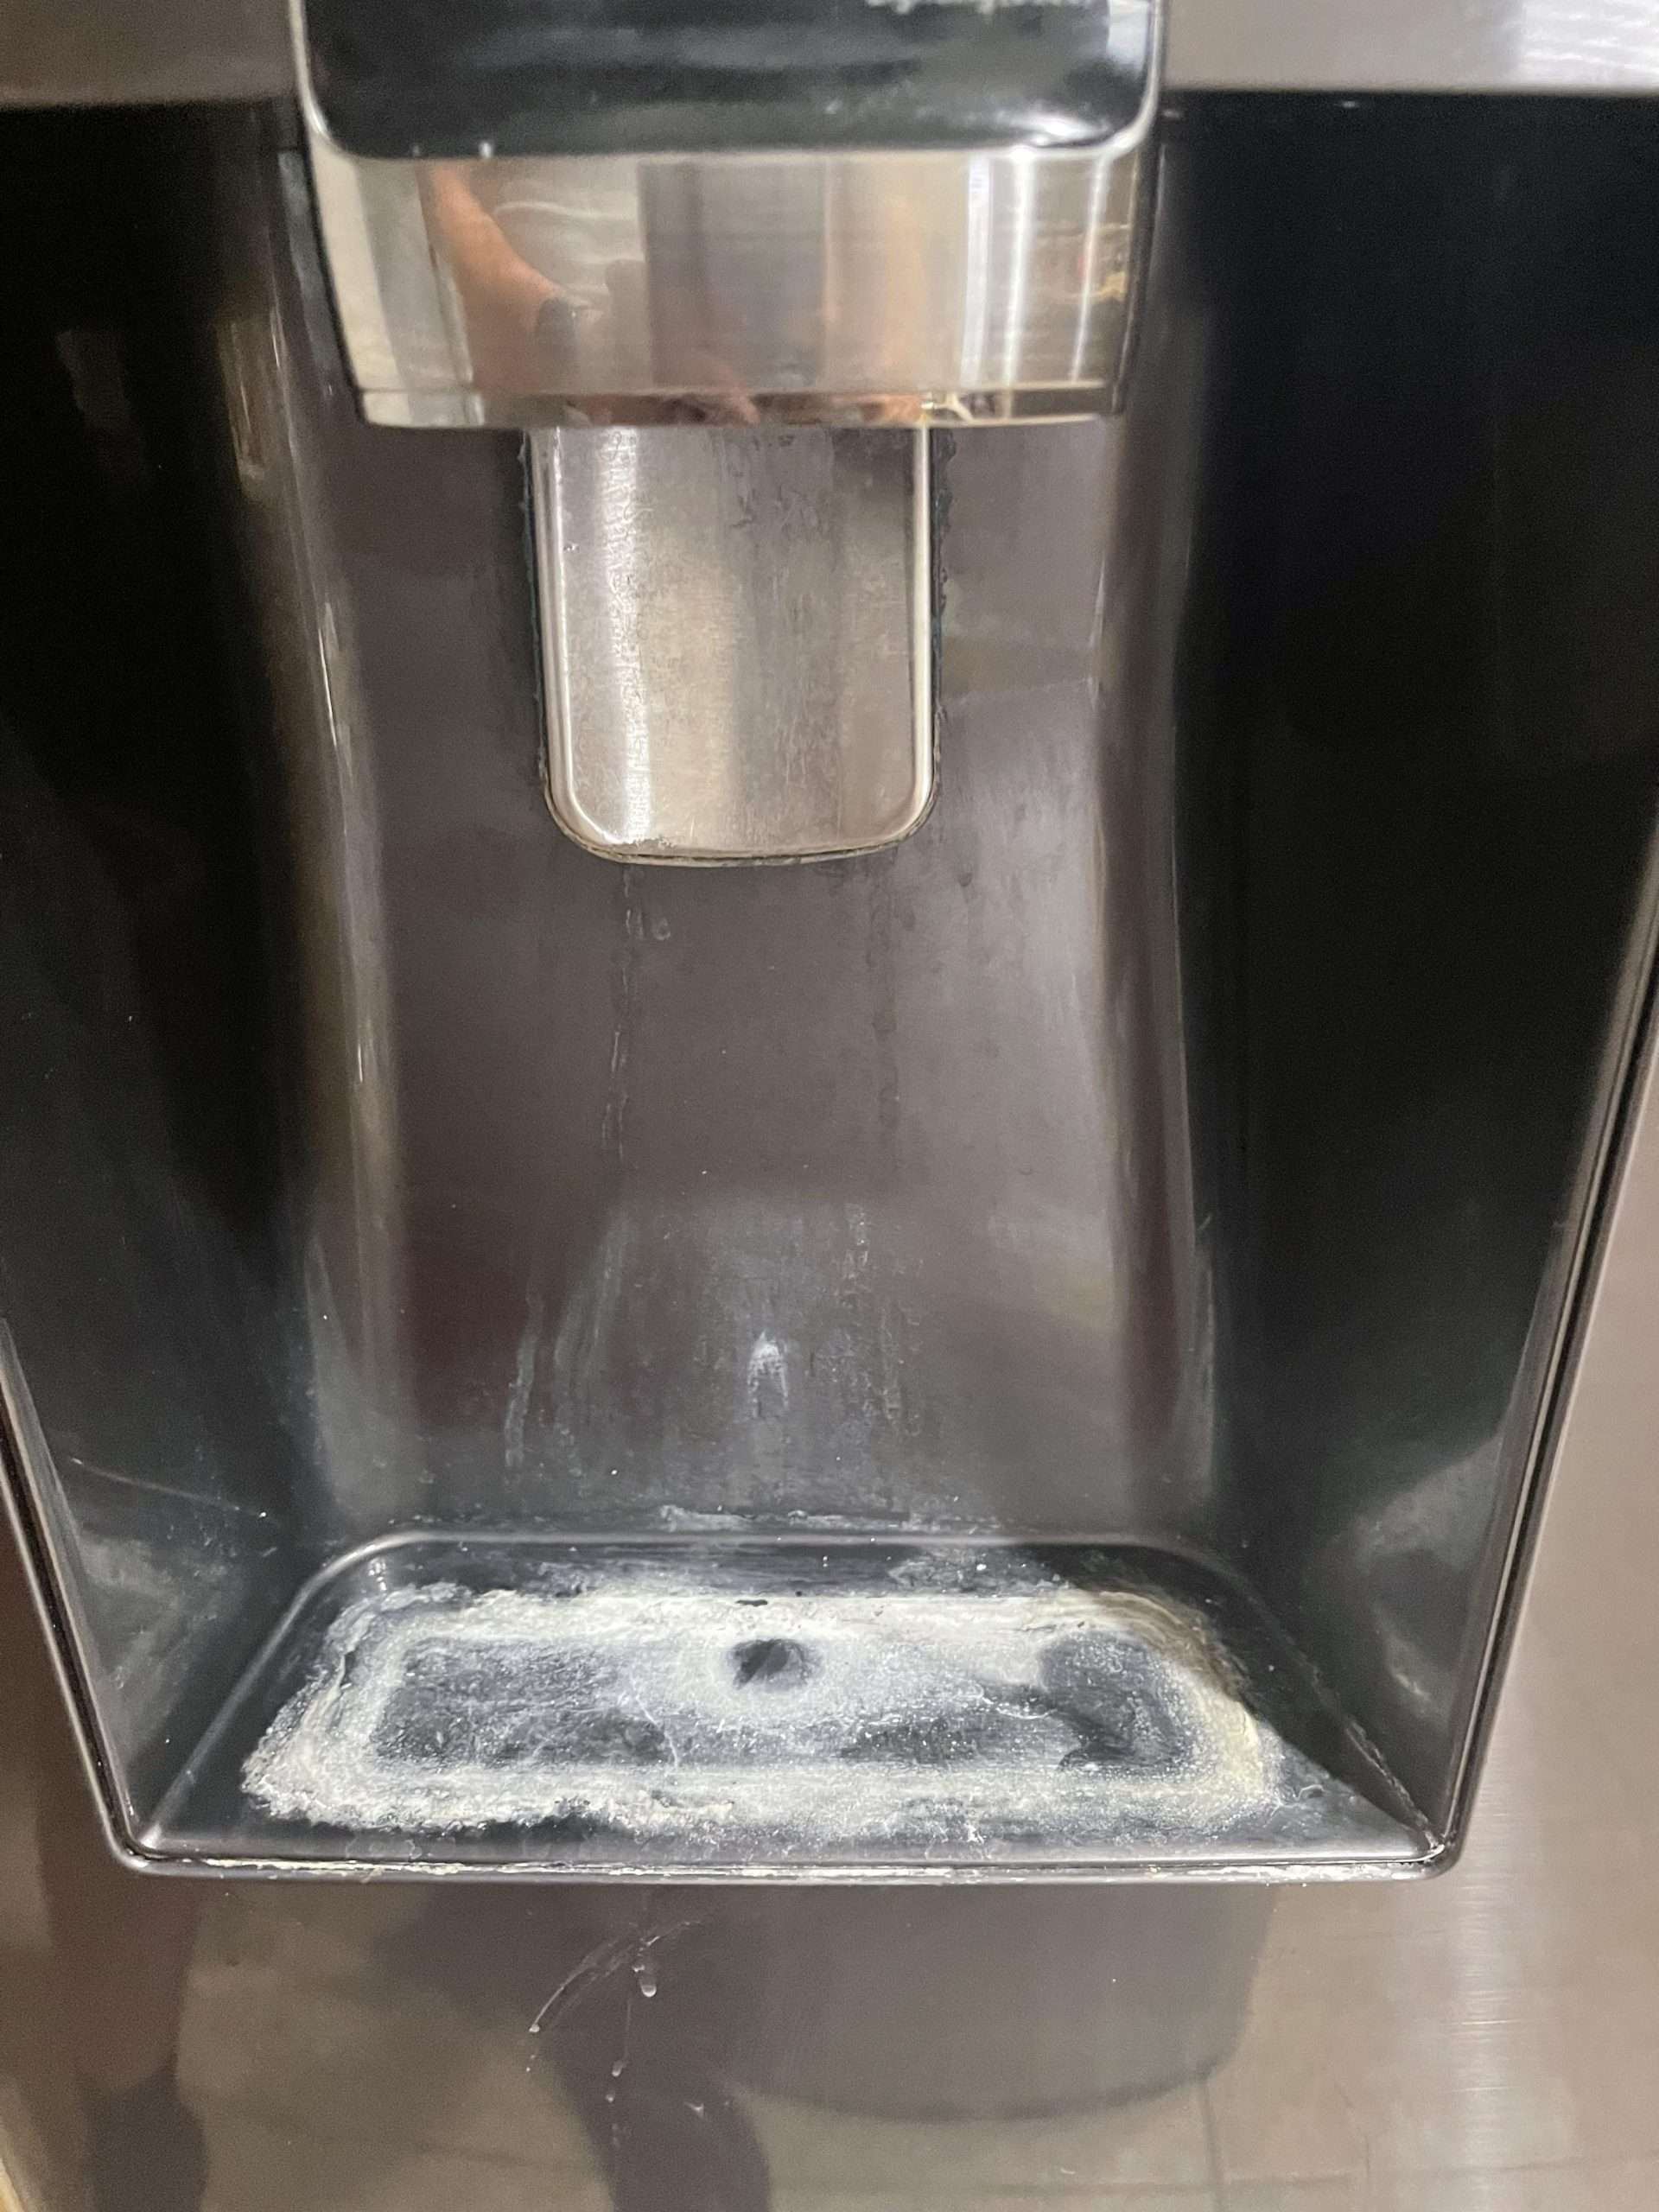
Before diving into the cleaning process, it’s helpful to understand what calcium deposits are and why they form. Calcium and magnesium are naturally occurring minerals present in many water sources. When this water flows through your refrigerator’s water dispenser, these minerals can gradually accumulate and harden, forming a chalky residue known as scale or calcium deposits. Factors contributing to the build-up include:
- Hard water: Water with high mineral content accelerates deposit formation.
- Infrequent use: Stagnant water allows minerals to settle and solidify.
- Temperature fluctuations: Changes in temperature can also contribute to mineral precipitation.
Step-by-Step Guide to Removing Calcium Deposits
Here’s a simple guide to effectively remove those annoying calcium deposits from your refrigerator water dispenser:
1. Gather Your Supplies
You’ll need:
- White vinegar
- Clean water
- A clean cloth or sponge
- A small container or bowl
- A toothpick or small brush (optional, for stubborn deposits)
2. Prepare the Cleaning Solution
Mix equal parts white vinegar and clean water in a container. Vinegar’s acidity effectively dissolves calcium deposits without harsh chemicals.
3. Soak the Dispenser Components
If possible, detach any removable parts of the dispenser, such as the nozzle or tray. Soak these components in the vinegar solution for at least 30 minutes; For non-removable parts, saturate a clean cloth with the solution and gently wipe down the affected areas. Let the solution sit for a few minutes to loosen the deposits.
4. Flush the Water Line
Fill a container with the vinegar solution and use it to prime and flush the water line. Dispense the solution through the dispenser until the container is empty. This will help dissolve deposits within the internal tubing.
5. Scrub and Rinse
Use a toothpick or small brush to gently scrub away any stubborn calcium deposits from the dispenser nozzle and surrounding areas. Rinse all components thoroughly with clean water to remove any traces of vinegar.
6. Repeat if Necessary
For heavy build-up, you may need to repeat the soaking, flushing, and scrubbing steps. Be patient and persistent; the deposits should gradually dissolve with repeated treatments.
Preventing Future Calcium Build-up
Once you’ve successfully removed the existing deposits, take steps to prevent future build-up:
- Use a water filter: A water filter can reduce the mineral content in your water, slowing down deposit formation.
- Flush the dispenser regularly: Dispense water regularly, even if you’re not thirsty, to prevent stagnation;
- Clean the dispenser frequently: Wipe down the dispenser nozzle and surrounding areas with a damp cloth every week.
- Consider a water softener: If you have hard water, a water softener can significantly reduce mineral content throughout your home.
Maintaining a clean and functional refrigerator water dispenser is crucial for ensuring the quality and safety of your drinking water. By following these simple steps, you can effectively remove calcium deposits and enjoy a refreshing glass of water without the worry of mineral build-up. The key is regular maintenance and preventative measures to keep your dispenser in top condition. The first step in having fresh water is to remove those pesky calcium deposits from refrigerator water dispenser;
Beyond the immediate steps of cleaning, consider the long-term benefits of a proactive approach. Regular maintenance not only ensures better tasting water but also extends the lifespan of your refrigerator’s water dispenser components. Think of it as an investment in your appliance’s health and your own well-being.
TROUBLESHOOTING COMMON ISSUES
Even after thorough cleaning, you might encounter some lingering problems; Here are a few common issues and how to address them:
SLOW WATER FLOW
If water flow remains slow after cleaning, there might be a blockage further up the water line. Try disconnecting the water line from the refrigerator and flushing it with a stronger vinegar solution. You can also use a small, flexible brush designed for cleaning small tubes to dislodge any remaining debris.
UNPLEASANT TASTE
An unpleasant taste after cleaning usually indicates residual vinegar. Flush the system thoroughly with several gallons of clean water until the taste dissipates. You can also add a small amount of baking soda to the water during the flushing process to neutralize any remaining vinegar.
PERSISTENT DEPOSITS
For extremely stubborn deposits, consider using a commercially available descaling solution specifically designed for appliances. Follow the manufacturer’s instructions carefully. Remember to thoroughly rinse the system after using any chemical cleaner.
WHEN TO CALL A PROFESSIONAL
While most calcium deposit removal can be done DIY, there are times when it’s best to call in a professional. Consider contacting a qualified appliance repair technician if:
– You’re uncomfortable working with the refrigerator’s water lines.
– You suspect a more serious problem, such as a damaged water line or pump.
– The dispenser continues to malfunction after repeated cleaning attempts.
By taking a methodical approach to cleaning and addressing any lingering issues, you can maintain a clean and efficient refrigerator water dispenser. Remember, prevention is key, so stay vigilant and regularly clean and maintain your appliance to enjoy fresh, clean water for years to come. Your proactive efforts will not only improve the taste of your water but also safeguard your refrigerator’s functionality and longevity.
ADVANCED CLEANING TECHNIQUES FOR STUBBORN DEPOSITS
Sometimes, the standard vinegar and water solution isn’t enough to tackle particularly stubborn calcium deposits. In these cases, consider these advanced cleaning techniques:
1. BAKING SODA PASTE
Create a paste of baking soda and water. Apply this paste directly to the affected areas and let it sit for 15-20 minutes. The mild abrasive properties of baking soda can help loosen and lift stubborn deposits. Rinse thoroughly with clean water.
2. LEMON JUICE
Lemon juice, with its citric acid content, is another natural alternative to vinegar. Apply lemon juice directly to the deposits, let it sit for 30 minutes, and then scrub gently. The refreshing scent is an added bonus!
3. COMMERCIAL DESCALERS
For heavy-duty cleaning, consider using a commercially available descaler specifically formulated for appliances. These products often contain stronger acids than vinegar or lemon juice, so follow the manufacturer’s instructions carefully and wear gloves to protect your skin. Always rinse thoroughly after using a descaler.
MAINTAINING OPTIMAL WATER QUALITY
Beyond removing calcium deposits, maintaining optimal water quality involves several factors. Here are some tips:
– Regular Filter Replacement: Replace your refrigerator’s water filter according to the manufacturer’s recommendations. A clogged filter can reduce water flow, diminish water quality, and even damage your refrigerator.
– Inspect Water Lines: Periodically inspect the water lines connected to your refrigerator for leaks or damage. Replace any damaged lines promptly to prevent water damage and maintain proper water pressure.
– Monitor Water Hardness: If you live in an area with hard water, consider testing your water regularly to monitor its mineral content. This will help you determine the frequency of cleaning and whether a water softener is necessary.
– Consider a Pre-Filter: Install a pre-filter on the water line leading to your refrigerator to catch sediment and other large particles before they reach the refrigerator’s filter. This can extend the life of your main filter and improve water quality.
TROUBLESHOOTING COMMON WATER DISPENSER PROBLEMS
Even with regular cleaning and maintenance, you might encounter occasional problems with your water dispenser. Here are some common issues and how to troubleshoot them:
1. NO WATER FLOW
If your water dispenser isn’t dispensing any water, check the following:
– Is the water supply turned on?
– Is the water line kinked or blocked?
– Is the water filter clogged?
– Is the dispenser lever or button functioning properly?
2. LEAKY DISPENSER
A leaky dispenser can be caused by a worn-out valve or a damaged seal. Inspect the dispenser components for signs of wear and tear. If necessary, replace the affected parts. A qualified appliance repair technician can assist with more complex repairs.
3. ICE MAKER ISSUES
If your refrigerator’s ice maker is also experiencing problems, such as producing small or misshapen ice cubes, the water supply might be the culprit. Ensure that the water line is properly connected and that the water pressure is adequate. A clogged water filter can also affect ice maker performance.
FINAL THOUGHTS ON DISPENSER CARE
Taking care of your refrigerator’s water dispenser is a simple yet essential task that can significantly improve the quality of your drinking water and the lifespan of your appliance. Regular cleaning, maintenance, and prompt troubleshooting can prevent minor issues from escalating into major repairs. The joy of having fresh, clean water readily available is well worth the effort. Remember, consistent attention to detail is the key to a healthy and efficient water dispenser. Therefore, it is crucial to remove calcium deposits from refrigerator water dispenser for its long-term performance.