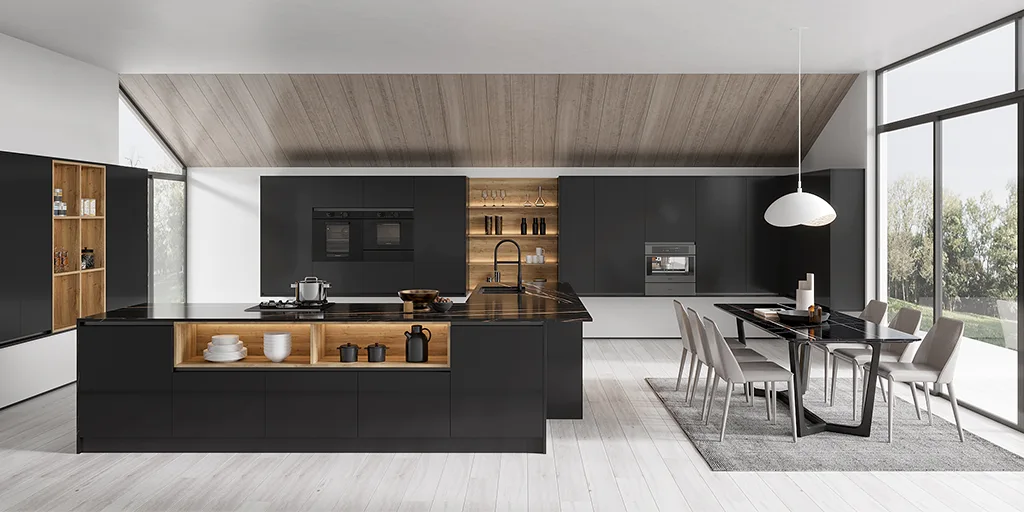
Skip to content
  • Home
  • Privacy Policy
  • FeedBack

singlehomeimprovements.com

Build & Home

  • Bathroom
  • Bedroom
  • Building
  • Kitchen
  • Water dispenser
  • Toggle search form

Building a 12×12 Shed: A Comprehensive Guide to Materials

Posted on 10 March 2025 By Redactor

Building a 12×12 shed is a rewarding DIY project. It requires careful planning and the acquisition of the right materials. Failing to adequately prepare can lead to delays and increased costs. This comprehensive guide breaks down the necessary materials, offering insights into quantities and potential alternatives. Let’s dive into the specifics, ensuring you’re fully equipped for your construction endeavor.

Table of Contents

Toggle
  • Foundation Materials: Setting a Solid Base
    • Concrete Slab Foundation
    • Gravel Base Foundation
    • Pier Foundation
  • Framing Materials: Building the Shed’s Skeleton
    • Lumber:
    • Fasteners:
  • Roofing Materials: Protecting Your Investment
    • Asphalt Shingles:
    • Metal Roofing:
    • Corrugated Plastic Roofing:
  • Siding Materials: Enhancing the Shed’s Appearance
    • Vinyl Siding:
    • Wood Siding:
    • Metal Siding:
  • Doors and Windows: Adding Functionality
  • Additional Considerations
  • Author

Foundation Materials: Setting a Solid Base

The foundation is the cornerstone of your shed’s stability. A well-constructed foundation prevents settling and protects the structure from moisture damage. Several options exist, each with its own material requirements. We’ll explore three common choices: concrete slabs, gravel bases, and pier foundations.

Concrete Slab Foundation

  • Concrete Mix: You’ll need enough concrete to pour a slab approximately 4 inches thick across the 12×12 foot area. Calculate the cubic yards needed based on this thickness and consult your local supplier for accurate quantities. Consider adding a concrete admixture to enhance strength and durability.
  • Rebar: Reinforcing steel bars (rebar) are crucial for preventing cracking. Determine the appropriate gauge and spacing according to local building codes and your concrete mix strength.
  • Gravel Base: A layer of compacted gravel beneath the concrete improves drainage and provides a level surface. You’ll need enough gravel to create a 4-6 inch base.
  • Form Boards: These temporary boards define the perimeter of your concrete slab. Choose pressure-treated lumber to withstand moisture.
  • Vapor Barrier: A plastic sheeting placed beneath the concrete prevents moisture migration from the ground.

Gravel Base Foundation

A gravel base offers a simpler, less expensive alternative to a concrete slab. This method is suitable for well-drained soil. However, it may not be as robust in areas prone to frost heave or significant ground movement.

  • Gravel: You’ll need a substantial amount of compacted gravel, potentially 6-12 inches deep depending on soil conditions. Ensure it’s graded to provide adequate drainage.
  • Weed Barrier Fabric: This fabric prevents weed growth through the gravel and helps maintain a level surface.
  • Leveling Tool: A rake or a landscaping level will be crucial for creating a perfectly level base.

Pier Foundation

Pier foundations are ideal for uneven terrain or areas with poor drainage. They involve setting individual concrete piers to support the shed’s frame.

  • Concrete Piers: Calculate the number of piers needed based on the shed’s dimensions and weight. Each pier should be sufficiently sized and deeply set to provide adequate support.
  • Gravel: Similar to other foundation types, gravel is used to create a stable base for each pier.
  • Concrete Forms (for piers): These forms are necessary for creating evenly sized and shaped concrete piers.
  • Post Anchors: These will secure the base of the shed’s frame to each pier.

Framing Materials: Building the Shed’s Skeleton

The framing provides the structural integrity of your shed. Choosing high-quality lumber is essential for longevity and stability. Pressure-treated lumber is generally recommended for its resistance to rot and insect infestation. Let’s explore the necessary framing components.

Lumber:

You’ll require various sizes of pressure-treated lumber, including:

  • 4×4 posts: For corner posts and supports.
  • 2×4 studs: For wall framing.
  • 2×6 or 2×8 joists: For the floor and roof.
  • 2×4 rafters: For the roof structure.
  • Plywood or OSB sheathing: To cover the walls and roof.

Fasteners:

A wide range of fasteners is needed to connect the framing elements. This includes:

  • Galvanized nails: For various framing applications.
  • Wood screws: For added strength and durability in key areas.
  • Joist hangers: These metal brackets provide strong support for floor and roof joists.

Roofing Materials: Protecting Your Investment

The roof protects your shed from the elements. The choice of roofing material depends on your budget and aesthetic preferences. Common options include asphalt shingles, metal roofing, and corrugated plastic.

Asphalt Shingles:

Asphalt shingles offer a cost-effective and widely available solution. They’re relatively easy to install, but their lifespan is shorter than other roofing materials.

Metal Roofing:

Metal roofing is more durable and long-lasting than asphalt shingles. It’s also more resistant to fire and strong winds. However, it’s typically more expensive.

Corrugated Plastic Roofing:

Corrugated plastic is a lightweight and affordable alternative. It’s easy to install, but it’s not as durable as asphalt shingles or metal roofing.

Regardless of your choice, you’ll need underlayment to protect the sheathing from moisture and ensure proper shingle or panel installation. You’ll also need roofing nails or screws, depending on your chosen roofing material.

Siding Materials: Enhancing the Shed’s Appearance

Siding adds a finished look to your shed and protects the framing from the elements. Various materials are available, each offering different benefits.

Vinyl Siding:

Vinyl siding is a popular choice due to its affordability, low maintenance, and wide range of colors and styles. It’s resistant to rot and insect infestation.

Wood Siding:

Wood siding provides a more natural aesthetic. However, it requires more maintenance than vinyl siding, as it’s susceptible to rot and insect damage if not properly treated.

Metal Siding:

Metal siding is highly durable and long-lasting. It’s resistant to fire, strong winds, and insects. However, it can be more expensive than vinyl or wood siding.

Remember to include appropriate fasteners for your chosen siding material.

Doors and Windows: Adding Functionality

Doors and windows add functionality and ventilation to your shed. The size and type of doors and windows will depend on your needs and the shed’s design. You will need to factor in the cost of these items and any additional framing required to accommodate them. Appropriate hardware, such as hinges, handles, and locks, should also be included in your materials list.

Additional Considerations

Beyond the core materials, several other items are essential for a successful shed build. These include:

  • Safety equipment: Safety glasses, work gloves, and hearing protection are crucial for your safety during construction.
  • Measuring tools: A tape measure, level, and square are essential for accurate measurements and construction.
  • Hand tools: A hammer, screwdriver, saw, and drill are essential for assembling the shed.
  • Power tools: A circular saw, drill, and possibly a nail gun can significantly speed up construction.
  • Painting or staining materials (optional): To protect and enhance the appearance of your shed.

Thorough planning and the acquisition of all necessary materials are key to a successful shed-building project. Remember to check local building codes and obtain any necessary permits before beginning construction. By carefully considering each component, you’ll be well-prepared to construct a sturdy and long-lasting 12×12 shed. The satisfaction of completing this project yourself is a rewarding experience. Double-check all measurements and follow the manufacturer’s instructions for all materials used. Consider consulting with experienced builders for advice if you encounter any challenges. Enjoy the process and the finished product!

Author

  • Redactor
    Redactor

    Daniel Carter is a seasoned expert in construction and home renovation with over 15 years of hands-on experience in the industry. From small DIY projects to large-scale renovations, he has worked with a wide range of materials, techniques, and design trends, helping homeowners bring their ideas to life. Daniel’s passion for building started in his childhood when he helped his family renovate their home. Over the years, this passion turned into a profession, leading him to explore everything from architectural design to energy-efficient solutions. On Build & Renovate Hub, Daniel shares expert advice, step-by-step guides, and in-depth reviews of construction materials, tools, and techniques. Whether you’re planning a complete home remodel or just looking for practical maintenance tips, his goal is to make the renovation process easier, more efficient, and cost-effective for everyone.

    View all posts

Related posts:

  1. Building a 12×16 Shed: A Comprehensive Guide
  2. Essential Building Materials: A Comprehensive Guide
  3. Building Materials: A Comprehensive Guide
  4. Building a 12×12 Room: A Comprehensive Materials Guide
  5. Building Materials: A Comprehensive Guide
  6. Building Construction Materials: A Comprehensive Guide
  7. Foundation Building Materials in Fort Wayne, Indiana
  8. Cheapest Materials for House Construction: A Comprehensive Guide
Building

Post navigation

Previous Post: Understanding the Foundation Building Materials Industry and the Importance of Investor Relations
Next Post: Troubleshooting Your Water Heater Thermostat

More Related Articles

The Burj Khalifa: A Symphony of Materials Building
Advantages and Disadvantages of Limestone as a Building Material Building
Surplus Building Materials in Farmers Branch: A Comprehensive Guide Building
Efficient Resource Management in Fire Emblem: Three Hopes Building
The 2021 Surge in Building Material Prices Building
Odus Pack: Your Premier Building Materials Supplier in North Little Rock Building

Tag Cloud

Your browser doesn't support the HTML5 CANVAS tag.

  • Uncategorised
  • Kitchen
  • Bathroom
  • Water dispenser
  • Building
  • Bedroom

Recent Posts

  • The Ultimate Guide to Foods That Fuel Muscle Growth
  • Whirlpool Refrigerator Leaking Water From Ice Dispenser: Troubleshooting and Solutions
  • Choosing the Best Material to Build a House With
  • Kitchen Sink Sprayer Attachment Replacement: A Comprehensive Guide
  • Dish Soap and Hand Soap Dispenser for Kitchen Sink: A Comprehensive Guide

Copyright © 2025 singlehomeimprovements.com.

Powered by PressBook Blog WordPress theme