A cold shower is never a welcome surprise, and often the culprit behind this icy morning shock is a malfunctioning water heater. One of the most common issues homeowners face is a pilot light that refuses to ignite. This can be incredibly frustrating, leaving you wondering why your water heater isn’t cooperating and how to fix the problem. Understanding the potential causes of this issue, from simple solutions to more complex repairs, can help you diagnose the problem and restore hot water to your home. Don’t despair just yet; let’s explore the reasons why your pilot light might be stubbornly refusing to light;
Common Reasons for a Pilot Light That Won’t Light
Several factors can prevent your pilot light from igniting. Here are some of the most frequent offenders:
- Gas Supply Issues: The most basic, yet often overlooked, problem is a lack of gas. Check that your gas supply is turned on and that there are no issues with your gas company.
- Dirty Pilot Orifice: Over time, dust, debris, and corrosion can accumulate in the pilot orifice, restricting gas flow and preventing the pilot light from igniting.
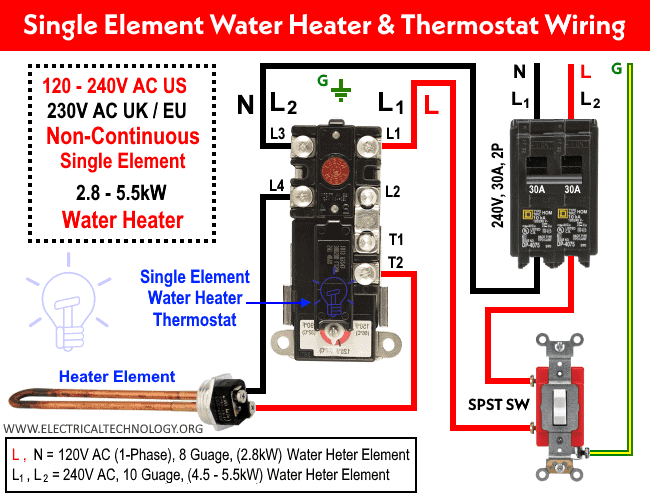
- Faulty Thermocouple: The thermocouple is a safety device that senses the pilot light flame. If it’s not working correctly, it won’t allow the main gas valve to open, effectively shutting down the water heater.
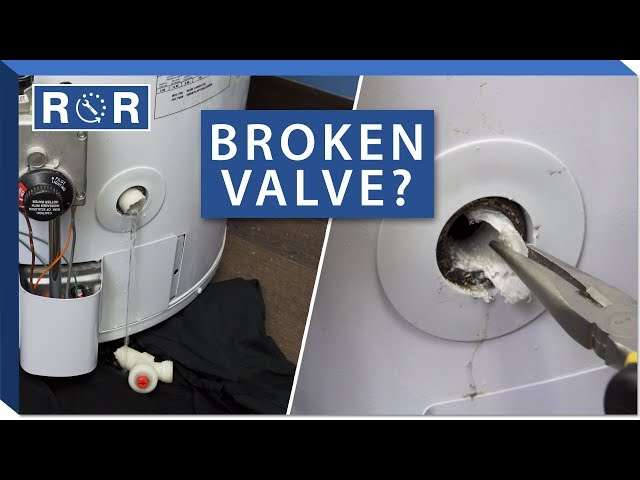
- Damaged Gas Valve: A malfunctioning gas valve can prevent gas from reaching the pilot light, rendering it impossible to light.
- Drafts: Strong drafts can blow out the pilot light as you’re trying to ignite it.
Troubleshooting Steps
Before calling a professional, you can try these troubleshooting steps:
- Check the Gas Supply: Ensure that the gas valve to the water heater is fully open. Also, check other gas appliances in your home to confirm that gas is flowing.
- Clean the Pilot Orifice: Turn off the gas supply to the water heater. Use a small wire or needle to carefully clean any debris from the pilot orifice. Be gentle to avoid damaging the orifice.
- Inspect the Thermocouple: Look for any signs of damage or corrosion on the thermocouple. If it appears damaged, it will likely need to be replaced.
- Relight the Pilot Light Following Instructions: Carefully follow the manufacturer’s instructions for relighting the pilot light. This usually involves pressing and holding the pilot button while lighting the pilot with a lighter or match.
When to Call a Professional
If you’ve tried the troubleshooting steps above and your pilot light still won’t light, it’s time to call a qualified plumbing or HVAC technician. Issues like a faulty gas valve or a damaged gas line require professional expertise to diagnose and repair safely. Attempting to fix these problems yourself can be dangerous.
Preventative Maintenance
Regular maintenance can help prevent future problems with your water heater. Consider having your water heater inspected and serviced annually by a qualified technician. This can help identify potential problems before they become major issues and extend the lifespan of your water heater.
Finally, if you’re still grappling with the mystery of why your pilot light won’t light, it’s important to remember safety first. Don’t hesitate to seek professional assistance, as working with gas appliances can be risky. A little patience and the right expertise can get your hot water flowing again in no time. The stubborn pilot light will be a distant memory, replaced by the comfort of a warm shower.
ADVANCED DIAGNOSTIC PROCEDURES
Beyond the preliminary troubleshooting steps, a more rigorous diagnostic approach may be necessary. This often involves employing specialized tools and techniques accessible primarily to trained professionals. For instance, a manometer can be utilized to assess the gas pressure reaching the water heater, thereby confirming adequate supply and identifying potential restrictions within the gas line. Furthermore, a multi-meter can be employed to verify the electrical continuity of the thermocouple, effectively ascertaining whether it is functioning within acceptable parameters. It is imperative to emphasize that these procedures necessitate a comprehensive understanding of gas appliance mechanics and adherence to stringent safety protocols.
GAS VALVE ASSESSMENT
The gas valve constitutes a critical component of the water heater, regulating the flow of natural gas to both the pilot light and the main burner. A compromised gas valve may exhibit a multitude of failure modes, including but not limited to, internal leakage, solenoid malfunction, and mechanical obstruction. Direct assessment of the gas valve’s functionality typically requires disconnecting the gas supply and employing specialized testing equipment. Given the inherent risks associated with manipulating gas-bearing components, such procedures should invariably be entrusted to a licensed and experienced technician.
VENTILATION CONSIDERATIONS
Adequate ventilation is paramount for the safe and efficient operation of any gas-fired appliance, including water heaters. Insufficient ventilation can lead to the accumulation of carbon monoxide, a colorless and odorless gas that poses a significant health hazard. Ensure that the area surrounding the water heater is free from obstructions and that any ventilation ducts or flues are clear and unobstructed. Periodic inspection of the flue pipe for signs of corrosion or damage is also recommended. In instances where ventilation is deemed inadequate, remediation measures, such as the installation of additional ventilation ducts, may be necessary.
LONG-TERM OPERATIONAL INTEGRITY
Maintaining the longevity and operational integrity of a water heater necessitates a proactive approach to preventative maintenance. Regular flushing of the tank to remove sediment buildup is crucial, as accumulated sediment can impede heat transfer and reduce the efficiency of the unit. Furthermore, periodic inspection of the anode rod, a sacrificial component designed to protect the tank from corrosion, is recommended. Replacement of the anode rod when it becomes depleted can significantly extend the lifespan of the water heater. Finally, adherence to the manufacturer’s recommended maintenance schedule is essential for ensuring optimal performance and minimizing the likelihood of future malfunctions.
