The quest for optimal storage solutions within the confines of a bedroom often leads to innovative and space-saving designs. One such design that’s gaining popularity is the **L shaped wardrobe designs for bedroom**. These designs cleverly utilize corner spaces, often overlooked, to maximize storage capacity and create a seamless, aesthetically pleasing look. They offer a practical and stylish alternative to traditional wardrobes, particularly in rooms where space is a premium, or the room’s layout is not standard. This unique configuration provides significantly more hanging space, shelving, and drawer space than a standard wardrobe, transforming your bedroom into a well-organized and visually appealing sanctuary.
Maximizing Space with L Shaped Wardrobes
L shaped wardrobes are incredibly versatile and can be customized to fit any bedroom layout. They are particularly effective in:
- Corner Spaces: Utilizing otherwise dead space in corners.
- Small Bedrooms: Providing ample storage without taking up excessive floor space.
- Awkwardly Shaped Rooms: Adapting to irregular room dimensions for a custom fit.
The beauty of this design lies in its adaptability. You can tailor the internal configuration to your specific needs, incorporating hanging rails, shelves, drawers, and even shoe racks. Furthermore, the exterior design can be matched to your existing bedroom decor, creating a cohesive and harmonious look.
Design Considerations for Your L Shaped Wardrobe
When planning your **L shaped wardrobe designs for bedroom**, several factors need careful consideration:
- Dimensions: Accurate measurements of your corner space are crucial to ensure a perfect fit.
- Internal Configuration: Think about your storage needs – how much hanging space, shelving, and drawers do you require?
- Materials: Choose materials that complement your existing furniture and are durable enough to withstand daily use. Consider options like wood, laminate, or even mirrored doors.
- Style: Select a style that aligns with your bedroom’s overall aesthetic – modern, minimalist, traditional, etc.
- Doors: Hinged vs. sliding doors ⎻ consider the space available for door swing. Sliding doors are often preferable in smaller rooms.
Examples of L Shaped Wardrobe Designs
Here are a few ideas to inspire your L shaped wardrobe design:
- Corner Walk-in Wardrobe: Transform your corner into a mini walk-in closet with ample hanging space and shelving.
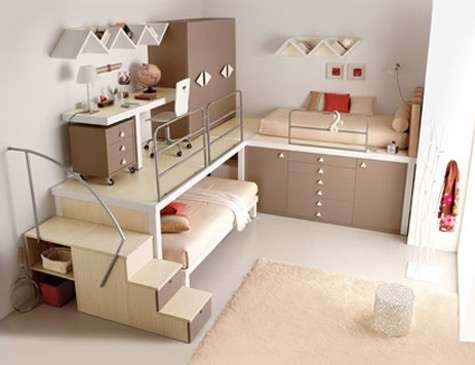
- Integrated Desk & Wardrobe: Combine your wardrobe with a built-in desk for a functional and space-saving solution.
- Mirrored Wardrobe: Create the illusion of more space with mirrored wardrobe doors.
Comparative Table: L Shaped vs. Traditional Wardrobes
| Feature | L Shaped Wardrobe | Traditional Wardrobe |
|---|---|---|
| Space Utilization | Excellent ⎯ Maximizes corner space | Limited ⎯ Requires straight wall space |
| Storage Capacity | Generally higher due to corner utilization | Varies depending on size |
| Customization | Highly customizable to fit specific needs | Limited customization options |
| Aesthetic Appeal | Can be seamlessly integrated into room design | May stand out as a separate piece of furniture |
Ultimately, selecting the ideal wardrobe design depends on your individual needs and preferences. However, the benefits of **L shaped wardrobe designs for bedroom**, in terms of space optimization, customization, and aesthetic appeal, make them a compelling option for modern bedrooms. Consider the points discussed above to design a solution that truly meets your requirements and enhances your living space.
Beyond the purely functional aspects, remember that an L-shaped wardrobe can significantly contribute to the overall ambiance of your bedroom. Think about lighting – incorporating LED strips within the wardrobe’s interior or above the doors can add a touch of sophistication and improve visibility. Also, consider the hardware – door handles, knobs, and hinges – as these small details can make a big difference in the overall look and feel. Don’t underestimate the power of color; a well-chosen color palette can complement your existing décor and create a sense of harmony and tranquility.
CHOOSING THE RIGHT PROFESSIONAL FOR INSTALLATION
While DIY installation might seem tempting, particularly for those with experience in carpentry, it’s often advisable to engage a professional installer. L-shaped wardrobes, especially custom-built ones, can be complex to assemble and install correctly. A professional will have the necessary tools, expertise, and experience to ensure a flawless installation, avoiding costly mistakes and potential damage to your wardrobe or bedroom. When selecting an installer, be sure to:
– Check their credentials and experience: Ask for references and review their previous work.
– Obtain multiple quotes: Compare prices from different installers to ensure you’re getting a fair deal.
– Inquire about their warranty: Ensure they offer a warranty on their workmanship in case of any issues.
– Discuss the installation process: Understand the steps involved and the timeline for completion.
Proper installation is crucial for the longevity and functionality of your L-shaped wardrobe. Investing in professional installation will ultimately save you time, money, and frustration in the long run.
MAINTAINING YOUR L SHAPED WARDROBE
Once your L-shaped wardrobe is installed, proper maintenance is essential to keep it looking its best and functioning smoothly for years to come. Here are a few tips to follow:
– Regular cleaning: Wipe down the exterior surfaces regularly with a damp cloth to remove dust and dirt.
– Avoid overloading: Don’t overload the shelves or hanging rails, as this can cause damage over time.
– Inspect hinges and hardware: Check the hinges and hardware periodically and tighten them if necessary.
– Ventilation: Ensure proper ventilation inside the wardrobe to prevent moisture buildup and mildew growth. Consider using moisture absorbers if you live in a humid climate.
– Protect from sunlight: Avoid exposing your wardrobe to direct sunlight for extended periods, as this can cause fading and discoloration.
By following these simple maintenance tips, you can keep your L-shaped wardrobe in pristine condition and enjoy its benefits for many years to come. Remember, a well-maintained wardrobe not only looks great but also helps to keep your clothes organized and protected.
Ultimately, investing in an L-shaped wardrobe is an investment in your home and your well-being. By carefully considering the design, installation, and maintenance aspects, you can create a functional and aesthetically pleasing storage solution that will enhance your bedroom for years to come. The right **L shaped wardrobe designs for bedroom** can transform your space into an organized and stylish retreat.