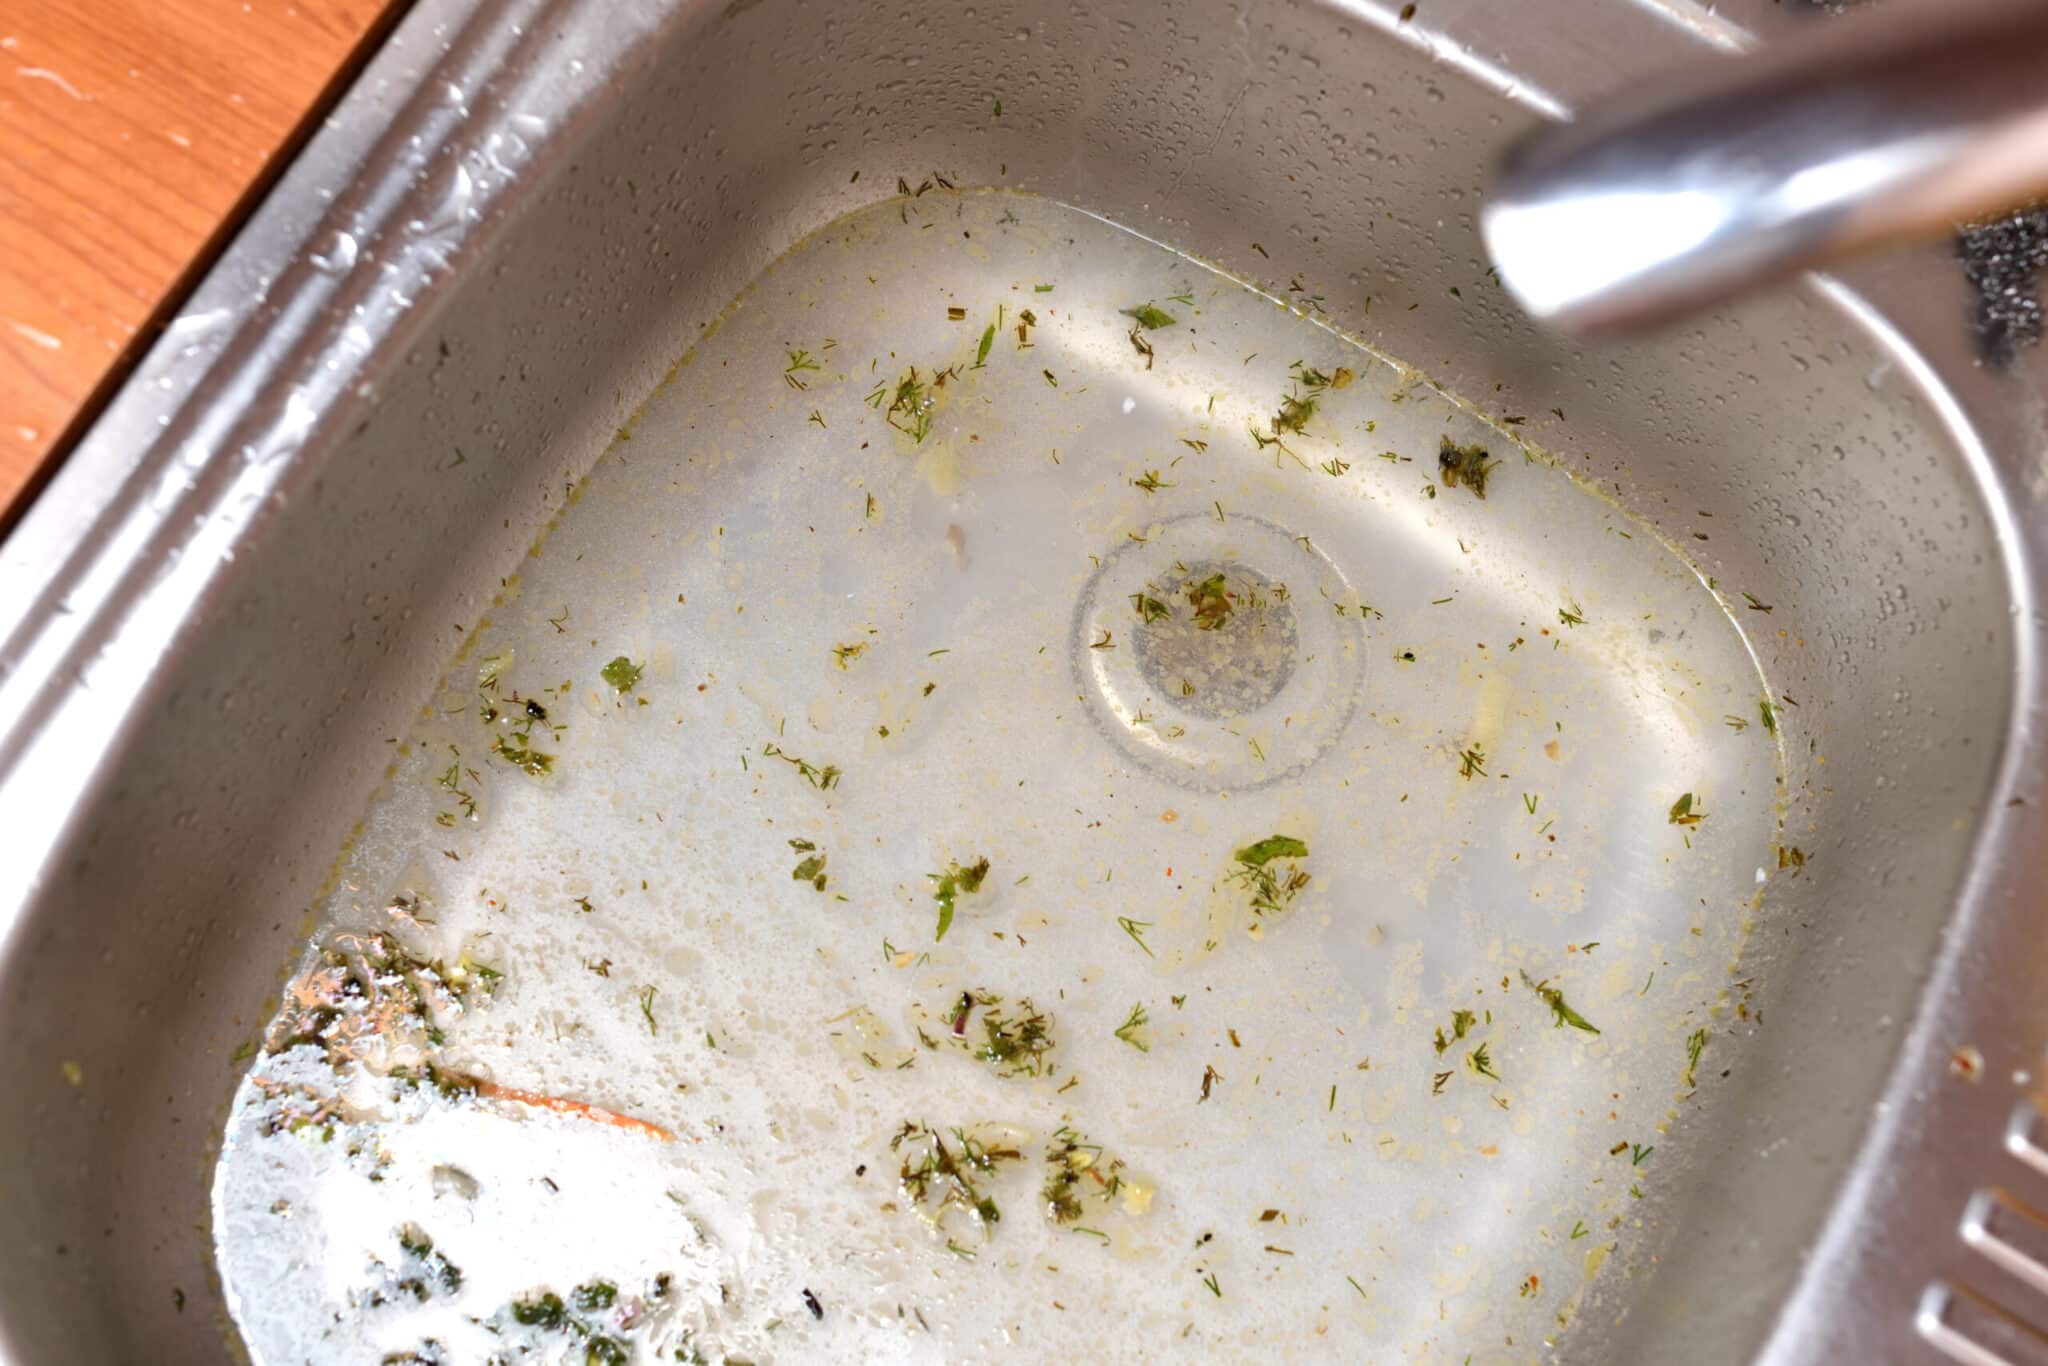
A smelly kitchen sink drain can be incredibly unpleasant, turning a chore into a nose-wrinkling ordeal․ The lingering odor often points to a buildup of food particles, grease, and other organic matter that decomposes over time, creating a breeding ground for bacteria and a source of foul smells․ Luckily, there are several effective and relatively simple methods to address this common household issue and make your kitchen sink drain smell better․ With a little effort and some readily available ingredients, you can banish those unpleasant odors and restore freshness to your kitchen, keeping your kitchen sink drain smell better․
Identifying the Source of the Smell
Before you start tackling the odor, it’s helpful to pinpoint its origin․ Is the smell constant, or does it only appear when you run water? Does it smell like rotten eggs (sulfur), mildew, or something else entirely? Identifying the type of smell can give you clues about the specific cause․
- Rotten Egg Smell: This often indicates the presence of sewer gas, which can be caused by a dry P-trap (the curved pipe under your sink)․
- Mildewy Smell: This is often a sign of accumulated food debris and bacteria․
- General Foul Odor: This could be a combination of different organic materials decomposing․
Simple DIY Solutions
Often, a simple cleaning is all it takes to eliminate the smell․ Here are a few effective DIY solutions:
Baking Soda and Vinegar
This classic combination is a powerful odor neutralizer and drain cleaner․
- Pour one cup of baking soda down the drain․
- Follow with one cup of white vinegar․
- Let it fizz for 30 minutes․
- Flush with hot water for several minutes․
Boiling Water
Sometimes, a simple flush with boiling water is enough to dislodge grease and debris․
- Carefully pour a large pot of boiling water down the drain․
- Repeat if necessary․
Lemon or Citrus Rinds
Grinding lemon or citrus rinds in the garbage disposal (if you have one) can help freshen the drain and eliminate odors․
Deep Cleaning Your Drain
If the simple solutions don’t work, you may need to do a more thorough cleaning․
- Clean the Garbage Disposal: If you have a garbage disposal, clean it thoroughly․ You can use a brush and a mixture of soap and water․
- Clean the P-Trap: The P-trap can trap debris․ Carefully remove the P-trap (place a bucket underneath to catch any water) and clean it out․
Preventing Future Odors
Prevention is key to keeping your kitchen sink drain smelling fresh․ Avoid pouring grease down the drain, and regularly flush the drain with hot water․ Consider using a drain strainer to catch food particles․
Maintaining a clean kitchen environment goes beyond just surface appearances; it’s about creating a healthy and pleasant space, and ensuring your kitchen sink drain smell better is a crucial part of that․ By implementing these simple cleaning techniques and preventative measures, you can effectively combat unpleasant odors and enjoy a fresh, clean kitchen․
Another proactive step is to regularly disinfect your sink and drain․ A diluted bleach solution (be cautious and always wear gloves) can help kill bacteria and prevent build-up․ However, be mindful of the materials your sink and pipes are made of, as bleach can damage certain surfaces․ Always rinse thoroughly after using bleach․
WHEN TO CALL A PROFESSIONAL
If you’ve tried all the DIY methods and the smell persists, it might be time to call a plumber․ Persistent odors can indicate a more serious problem, such as a blocked vent pipe, a cracked drainpipe, or even issues with the sewer line․ Attempting to fix these problems yourself could lead to further damage and costly repairs․ A professional plumber has the tools and expertise to diagnose the issue accurately and provide a lasting solution․
CHOOSING THE RIGHT CLEANING PRODUCTS
When selecting commercial drain cleaners, opt for enzyme-based products․ These cleaners use natural enzymes to break down organic matter, rather than harsh chemicals that can damage your pipes and harm the environment․ Avoid chemical drain cleaners that contain sodium hydroxide or sulfuric acid, as these can corrode pipes over time․ Always read the product label carefully and follow the instructions for safe use․
A NOTE ON DRAIN STRAINERS
Investing in a good quality drain strainer is a simple but effective way to prevent food particles from entering your drain․ Choose a strainer with small enough holes to catch even small bits of food․ Empty and clean the strainer regularly to prevent odors from developing․
LONG-TERM MAINTENANCE TIPS
To maintain a fresh-smelling kitchen sink drain in the long run, consider these tips:
– Run hot water after each use: This helps flush away any remaining food particles․
– Avoid pouring fats, oils, and grease down the drain: These substances solidify as they cool, leading to blockages and unpleasant odors․
– Periodically flush the drain with baking soda and vinegar: This helps prevent build-up and keeps the drain clean․
– Clean your garbage disposal regularly: If you have a garbage disposal, grind ice cubes and lemon peels to freshen it up and dislodge any debris․
Remember, a little preventative maintenance can go a long way in keeping your kitchen sink drain smelling fresh and clean․ By following these tips and addressing any issues promptly, you can avoid costly repairs and enjoy a pleasant kitchen environment․ A healthy drain is a happy drain, and a happy drain contributes to a happy home․ Prioritizing regular cleaning and mindful practices will ensure your kitchen remains a welcoming and odor-free space for years to come․