Graniterock Salinas stands as a cornerstone of the construction industry in the region, offering a comprehensive range of concrete and building materials. With a long-standing commitment to excellence, Graniterock Salinas provides essential resources that underpin countless projects, from residential homes to large-scale infrastructure developments. The company’s dedication to quality assurance and customer satisfaction has cemented its reputation as a trusted partner for contractors, developers, and homeowners alike. The extensive selection of materials and the expert support offered by Graniterock Salinas make it a vital asset to the local community and beyond.
The Graniterock Advantage: Beyond Just Materials
Graniterock Salinas understands that success in construction goes beyond simply providing building materials. They offer a holistic approach, focused on building strong relationships and providing solutions tailored to each project’s unique needs. This commitment translates into:
- Expert Consultation: Experienced professionals provide guidance on material selection, application techniques, and project planning.
- Reliable Delivery: Ensuring timely and efficient delivery of materials to keep projects on schedule.
- Quality Assurance: Rigorous testing and quality control measures to guarantee the performance and durability of all products.
Concrete Solutions Tailored to Your Needs
Concrete is the lifeblood of many construction projects, and Graniterock Salinas offers a wide array of concrete mixes and solutions to meet diverse requirements. From standard mixes for foundations and slabs to specialized concrete for high-strength applications, they have the perfect solution. Consider these factors when choosing your concrete:
Understanding Concrete Mix Designs
- Strength Requirements: The load-bearing capacity needed for the specific application.
- Workability: The ease with which the concrete can be placed and finished.
- Durability: Resistance to environmental factors such as freeze-thaw cycles and chemical exposure.
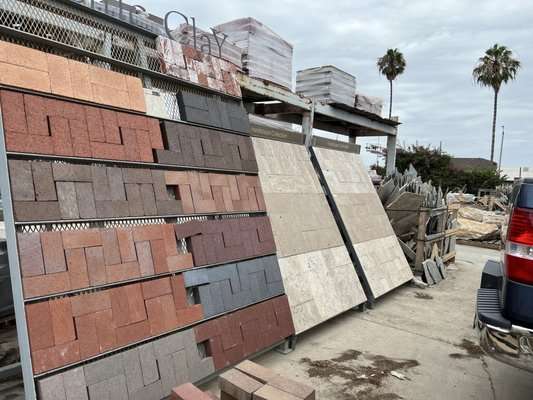
A Comprehensive Selection of Building Materials
Beyond concrete, Graniterock Salinas provides a vast selection of building materials, including:
- Aggregates: Sand, gravel, and crushed stone essential for concrete production and other construction applications.
- Masonry Supplies: Bricks, blocks, and mortar for creating durable and aesthetically pleasing structures.
- Landscaping Materials: Topsoil, mulch, and decorative rock for enhancing outdoor spaces.
The combination of expert knowledge, diverse product offerings, and a commitment to customer service allows Graniterock Salinas to stand out in the competitive landscape of building material suppliers.
Choosing the Right Supplier for Your Project
Selecting the right supplier is crucial for the success of any construction project. Consider factors such as product quality, reliability, and customer service. A dependable supplier like Graniterock, specifically *Graniterock Salinas*, can provide more than just materials; they offer partnership, expertise, and the assurance of a solid foundation for your building endeavors. When you partner with a quality supplier, you are investing in the long-term success of your projects.
Ultimately, the success of any building project hinges on the quality of its foundation and the reliability of its materials. That’s why *Graniterock Salinas* is a trusted partner for contractors, developers, and homeowners throughout the region, providing the essential resources and expertise needed to build a stronger future.
BEYOND THE PURCHASE: VALUE-ADDED SERVICES AT GRANITEROCK SALINAS
Choosing a building materials supplier shouldn’t be solely based on price. Consider the long-term value and potential cost savings offered through value-added services. At Graniterock Salinas, these services are designed to streamline your project, minimize waste, and ensure optimal results. Explore these offerings to maximize your investment:
– Project Management Support: Tap into Graniterock’s expertise to optimize material quantities, scheduling, and logistics, preventing costly delays and overspending.
– On-Site Material Testing: Ensure compliance with project specifications through on-site testing services, verifying the quality and performance of delivered materials.
– Waste Management Solutions: Partner with Graniterock to implement sustainable waste management practices, minimizing environmental impact and potentially reducing disposal costs.
NAVIGATING MATERIAL SELECTION: TIPS FOR SUCCESS
Selecting the right materials for your project can be a daunting task. Here are some key considerations to guide your decision-making process:
DEFINING YOUR PROJECT’S NEEDS
– Understand the Application: Clearly define the intended use of the material and the performance requirements it must meet.
– Consider Environmental Factors: Account for local climate conditions, soil properties, and potential exposure to chemicals or pollutants.
– Evaluate Budget Constraints: Balance performance requirements with budgetary limitations, exploring cost-effective alternatives where appropriate.
LEVERAGING EXPERT ADVICE
Don’t hesitate to seek guidance from experienced professionals. Graniterock Salinas offers expert consultation services to help you navigate the complexities of material selection. Remember to:
– Bring Detailed Project Plans: Provide comprehensive information about your project’s scope, specifications, and performance goals.
– Ask Specific Questions: Inquire about material properties, application techniques, and potential challenges.
– Request Samples and Literature: Obtain samples and technical literature to thoroughly evaluate material options.
BUILDING A SUSTAINABLE FUTURE: ENVIRONMENTALLY CONSCIOUS PRACTICES
In today’s world, sustainability is paramount. Graniterock Salinas is committed to environmentally responsible practices, offering a range of sustainable building materials and promoting eco-friendly construction techniques. When choosing your materials, consider options that:
– Utilize Recycled Content: Opt for materials that incorporate recycled content, reducing the demand for virgin resources.
– Are Locally Sourced: Choose materials sourced from local suppliers, minimizing transportation emissions and supporting the local economy.
– Promote Energy Efficiency: Select materials that contribute to energy efficiency, reducing the building’s overall environmental footprint.
By embracing sustainable practices, you can contribute to a healthier planet and create more durable and resilient structures. Remember that a responsible supplier can support your sustainability goals by providing transparent information about material sourcing, environmental certifications, and responsible waste management practices.